




Coil Installation Guide: Step-by-Step Tutorial for Beginners
Introduction to Coil Installation
Understanding the Basics of Coils
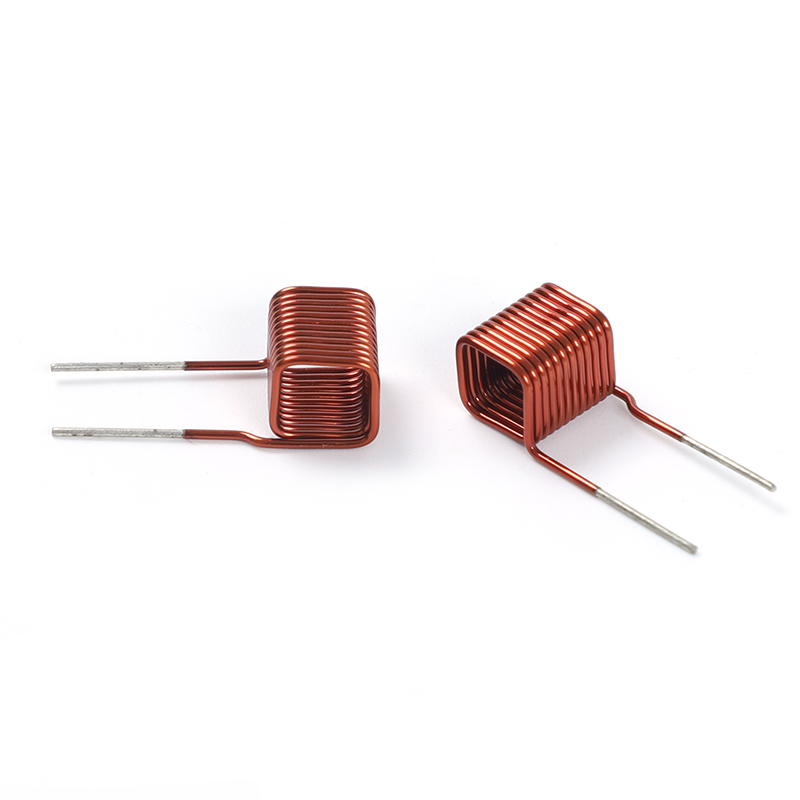
What are some things that you use a coil in? Coils are a key component in many of our electronics, and are the core of electromagnetic devices such as (but not limited to) vapes, HVAC systems, and electric motors. The coil is built to produce magnetic fields when it is filled with an electric current for meeting other requirements of the equipment to be served. The efficiency of a coil is based on its material, number of turns, and overall construction. It is this foundation that is so instrumental when it comes to making informed choices on what type of coil is right for you, and serves as a “building block” for anyone with an interest in coil installation!
Tools and Materials Needed
To get your coil installed, you need various specific tools and materials to get the job done. Basic tools consist of cutting pliers to cut the coil to the required length, beak pliers to form and set the turns and a screw driver or-nut key to fix the coil. In addition there is a need for a ohm meter which is used to measure resistance of coil and check coil is suitable for device. The work box below is a minimal tool kit needed to install a new coil:
|
Tool/Material |
Purpose |
|
Wire Cutters |
Cutting wire to desired length |
|
Needle-Nose Pliers |
Shaping and positioning coils |
|
Screwdriver/Hex Key |
Securing coil in place |
|
Ohm Meter |
Measuring coil resistance |
|
Enamel-Coated Wire |
Primary material for the coil itself |
|
Soldering Iron |
Making secure electrical connections |
Safety Precautions
You should never sacrifice safety when puting in a coil. Device must be powered down and if activated, connected to an external power source! This safety measure reduces the chances of electric shock and short out. Its wearables safety measures include gloves to protect from hidden wire and hot coil while making adjustments, preventing accidental cuts and burns. In addition, a check as to whether the coil is shorted out and installed properly per the manufacturer's directions is necessary. This includes verifying resistance with a ohm meter prior to use. Following those safety procedures not only keeps the user safe, it also helps ensure a long life and effective operation of your device.

Preparing for Installation
Assessing Compatibility and Specifications
Before you begin the process of installing a new coil, we recommend checking that the coil is compatible with your particular device. This means that you need to know what to look for in the specs of your device as well as in the coil to see that they will be compatible. Resistance (ohms), wattage range and the type of coil (such as single, dual or mesh) are also critical considerations. Devices will have a desired resistance range, and if you use a coil beyond this range you may get poor performance and/or damage your device.
Furthermore, consider the size of the coil, you may want to verify it fits into your device. In addition to electrical requirements, the coil must clip into and fit the install space of your device.
Measuring and Cutting the Wire
Whether you’re making a coil from scratch or need to modify an existing one, it all starts with measuring and cutting your wire. When building coils, choosing the correct wire gauge is a vital consideration since it directly affects the coil’s resistance. Thick wires (low gauge numbers) will have low resistance, thin wires (high gauge numbers) will have high resistance. Below is a quick reference for the resistance of wire by gage size:
|
Gauge (AWG) |
Diameter (mm) |
Resistance (Ohms/inch) |
|
24 |
0.51 |
0.17 |
|
26 |
0.40 |
0.28 |
|
28 |
0.32 |
0.44 |
Once you have chosen the correct wire gauge, find the length needed for your coil design or device specs cut.
Prepping the Installation Area
Pay attention while you prepare the socket for the coil socket, the socket is as important as the installation itself. Make sure the device or mod is turned off and, if there’s one, take the batteries out to avoid accidental firing. Cleaning the install spot makes sure there are no contaminants that will affect the way the new coil operates. Something as simple as a wipe down with a soft, dry cloth or an alcohol swab can help make a difference.
If you have a device with a rebuild-able deck, such as an RTA, or you are building coils for an RDA, look over you terminals or posts where your coil will be fastened. A little pre-tightening in these areas will save you some headaches when it comes time to install it. In addition to better installation, this helps to set the groundwork for better performance and safety.

Installing the Coil
Mounting the Coil
Before you install the coil, it is important to evaluate the surroundings and the structure support for checking. It is a compromise between easy access for maintenance, keeping out environmental problems and maximizing the operational benefit. For example, in the case of an HVAC system, this could be a location not in direct sunlight/not subject to water impingement but within some reasonable proximity to the air handler so as to minimize air flow resistance. In these cases when your coil comes with mounting brackets or hardware (some use studs, others use bolts) To be blunt about it… You actually need to use those! These brackets also serve as a support to fix the coil and to allow natural airflow and heat transfer.
Aside from choosing an appropriate location, it’s also important to think about how the position of the coil might affect its functionality. With cooling coils, ample room around the coil is necessary for free circulation of air to prevent reduced system efficiency and extend the life of the coil. On the other hand, as for a heating coil, it is required not to place the heating coil close to such heat-sensitive material or areas where heat cannot be accumulated for safety. You’ll also want to consider what future maintenance might look like, making sure there is plenty of clearance for any technicians that will need to work on the coil, without being required to unbolt a bunch of other items.
Finally, during the physical placement of the coil, care must be taken to ensure that the fins or tube are not bent or notched. Even small damage will influence the efficiency and life of the coil. If the install location has a lot of vibration then it may be necessary to ventury or vibration-isolate the motor in order to prevent wear or damage over time. This post will show you how to maximize your coil’s efficiency, so you can get the best performance and a long life from your coil, Your coil’s packing checklist.
Connecting the Coil
Once the coil is securely installed, the next thing to do is making its connections to the power supply and to whatever control systems or devices it will need to work with. This generally requires the meticulous connection of electrical leads to the terminals of the coil, a step which requires skilled manual labour. At this point, it is important to consult with the wiring diagram of the specific coil, which is typically made available by the manufacturer. This schematic is an important piece of literature, as it shows how to correctly connect the wires of the coil in order for it to work properly. Now, keep in mind, regardless of its added benefits, if wiring is done incorrectly it could both prevent the coil from functioning properly and lead to catastrophic damage to the coil and anything hooked to it.
To have a secure connection and safety, click all wires down and into place. Loose connections will cause the device to work sporadically and can create electrical dangers. You should also consider using appropriate tools and equipment to help secure and make more reliable connectors of this sort. It is also important that the power source be turned off whenever you are working with the wiring. This is a safety feature to prevent electric shock and other electric hazards.
Also having even a basic knowledge of electricity and familiarity with electrical schematics, electric diagrams can help quite a bit. For people with less experience, the help of a licensed electrician or instructions found in a thorough manual can be useful. This way we can verify that the connections have been made properly to the manufacturer’s recommendations making them code compliant as far as local codes are concerned. One strict protocol eliminates the necessity of the key; by this the coil is, repeatably connected to a circuit which is capable of using coil-sourced power.
Testing the Coil Installation
Once the coil is installed and wired, you will want to test the installation to make sure it works. This can be as simple as energizing the coil and seeing what happens. For the more advanced builders, the use of diagnostic tools to read voltage and resistance can give an even clearer picture of the coil’s behavior.
|
Test Parameter |
Expected Result |
Action if Deviant |
|
Voltage |
As specified by manufacturer |
Check connections and source voltage |
|
Resistance |
Within manufacturer's specifications |
Inspect for wiring errors or coil damage |
|
Operation |
Smooth activation without noise or excessive heat |
Investigate for incorrect installation or defective coil |
Performing these tests ensures that the coil is ready for
Post-Installation Care and Maintenance
Regular Inspection and Cleaning
Once you have fit your coil correctly, it’s very important to keep checking your coil and cleaning it to get the best performance. Inspect the coil monthly for cracking, corrosion, or damage of any kind. Dirt and debris often build up on the surfaces of the coils, and in extreme cases, can cut efficiency by 5-30% and cause higher energy usage. You can clean the coils surfaces with a brush or air blower softly. If dirt proves more stubborn, it is not bad to apply the cleaner but make sure the coil is well rinsed after application and allowed to dry thoroughly to avoid buildup of any residue.
By keeping your coil clean you extend the life of your coil, save money on energy and help the environment by not wasting resources due to dirt build up.
Troubleshooting Common Issues
Despite careful installation and maintenance, coils can experience problems that impact their effectiveness. Knowing some most typical problems and their solutions can save you time and to some extent, avoid future damages to your computer system. A table with common coil problems, what might be the cause, and what you can do to resolve the issue:
|
Issue |
Possible Cause |
Suggested Fix |
|
Reduced airflow |
Blockage due to dirt or debris |
Clean the coil thoroughly |
|
Overheating |
Obstructed airflow or high voltage |
Ensure proper airflow; check electrical connections |
|
Unusual noise |
Loose parts or foreign objects |
Tighten any loose components; remove foreign objects |
If these rudimentary measures do not clear up the problem, you may have to call a professional. Related questions Persistent issues can signify incorrect installation.

FAQ
What is the core function of a coil in electronic devices?
The primary role of a coil in a device is to produce magnetic fields when electric current flows through it. This enables the device to fulfill its purpose, such as the heating or cooling in HVAC systems, the motion that electric motors produce, or vapor production in vaping devices. The efficiency of a coil is relectant material, number of windings and the overall design.
What tools and materials are necessary for coil installation?
Here is what you’ll need if you want to install a coil: Specialized Tools And Materials Necessary For The Task If you wish, you can play by replacing the coil of the atomizer yourself. You will also need: Wire cutters (to cut the coil to length), needle-nose pliers (to bend and shape the coil to make it fit), a screwdriver or hex key (to tighten down the coil in the atomizer) and an ohm meter (to make sure the coil matches the device's needs).
Why are safety precautions important when installing a coil?
Safe practice is important when installing a coil to reduce hazards of electrical shock, shorting, and other hazards. Making sure the device is turned off and not powered at the source, wearing safety gear such as gloves to avoid cuts and burns, and to ensure that the coil is installed properly and not shorting out, these are important safety precautions that should be taken to protect its user, as well as the usable life and proper function of the device.
How do you assess the compatibility of a coil with your device?
Knowing whether a coil is compatible with your device means checking specifications (like resistance, as measured in ohms, and wattage range and type of coil — single coil, dual coil, mesh) for both your device and the coil. Coil fitment in your device's installation area and size is also vital. It is because performing a compatibility checking can avert the problems that may occur or can destroy your device.
What is the importance of measuring and cutting the wire correctly when building a coil?
Correctly measuring and cutting the wire is required to build a coil, the reason being that the gauge of the wire (thickness) has a direct effect on the resistance of the coil. It is important to use wire of the correct length and wire gauge to obtain the desired resistance which dictate the device's performance. If poorly measured, it can lead to poor performance or worse.
How do you prepare the installation area for a new coil?
To prepare your installation area, make sure your device or mod is powered off and that any batteries are taken out so you don't accidentally fire it. "Scrubbing the area of residue or debris and checking whether the terminals or posts are tight are also important. This preps for clean installation and u get peak performance.
What considerations should be made when mounting the coil?
In coil mounting, should not only consider the surrounding environment and structural support, and according to the maintenance and accessibility for the balance between climate factors in the life of HVAC system and the service life. Brackets or other hardware are necessary to orient the coil in the best direction. Finally, consider what maintenance may be required in the future by allowing enough room for clearing.
How do you connect the coil to the power source and control mechanisms?
Wiring the coil is very simple; you just connect good quality insulated wire to the coil in the same way that you would connect any other component. Disconnect the power source before hand, make sure all connections are snug and secure, and use the appropriate tools and equipment necessary to prevent against electric shock and to ensure the coil operates correctly.
What steps should be taken to test the coil installation?
The checking operation of the coil installation would be feeding power to the coil and checking it's reaction as well as measure the electrical parameters like voltage, resistance etc. by diagnostic utility. This helps to verify that the coil is functional and to debug any problems early in the process, and helps ensure the coil is prepared for use.
How do you maintain and troubleshoot a coil after installation?
Keep cool In order to ensure that coils hit their efficiency targets and do not wear out, they have had to be cleaned and checked every so often. You would then work to try to troubleshoot common problems such as lack of air flow, overheating, or a strange noise, and remove those problems, like cleaning the coil, making sure the air will flow and tightening model parts. For continuous issues, you may need the help of a pro.